My Tips For Painting En Plein Air
Jul 28, 2025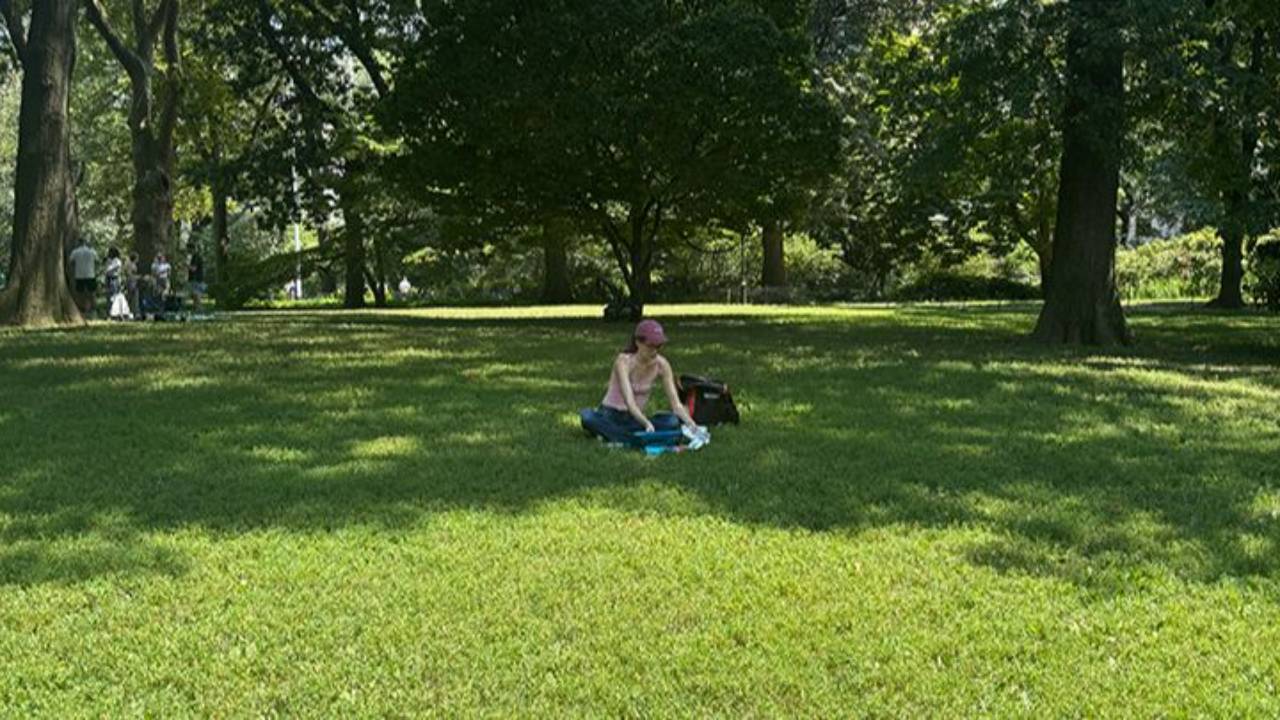
Not Sorry Art School founder and professional artist Sari Shryack shares her tips for painting en plein air...
Have you ever wondered what painters bring with them when they spend an afternoon painting outdoors?
Well, this blog is dedicated to this very question. Let me first say the most important tool you need en plein air is simply the confidence to hold your own in a potentially busy and hectic public space while navigating a painting. Which, as you may already know, is challenging in even the most controlled environments.
But before I jump past this step into the “meat and potatoes” of painting in nature, I want to tell you my personal favorite way to address the fear of plein air: play the Sims… only irl. Send yourself on a virtual-but-not-really quest to lay down a blanket, pull out your paint and brushes, and ya know, paint.
Truth be told, this is how I motivate myself to do many things I struggle to do, especially if the apprehension lay in the initial push to get your physical being to comply. One minute you’re playing a very realistic version of the Sims and the next thing you know you're making a little study of the trees in the park. Feel free to apply this technique in other areas of your life too!
First, when picking where to paint don’t over think it! Easier said than done I know, but I find the best perspective on choosing where to paint to be as follows: don’t spend too much energy making the best decision (it's impossible to pick the "perfect" spot), spend your energy making the decision you make the best it can be. (If that makes any sense, lol) Listen, if you pick an absolute stinker of a spot you can always pivot… literally, just use the full mobility of a circle to rotate 45, 90 or even 180 degrees to a better vantage point. I have seldom met a spot that was so horrible that a quick pivot didn’t offer me something worth studying for an hour or two.
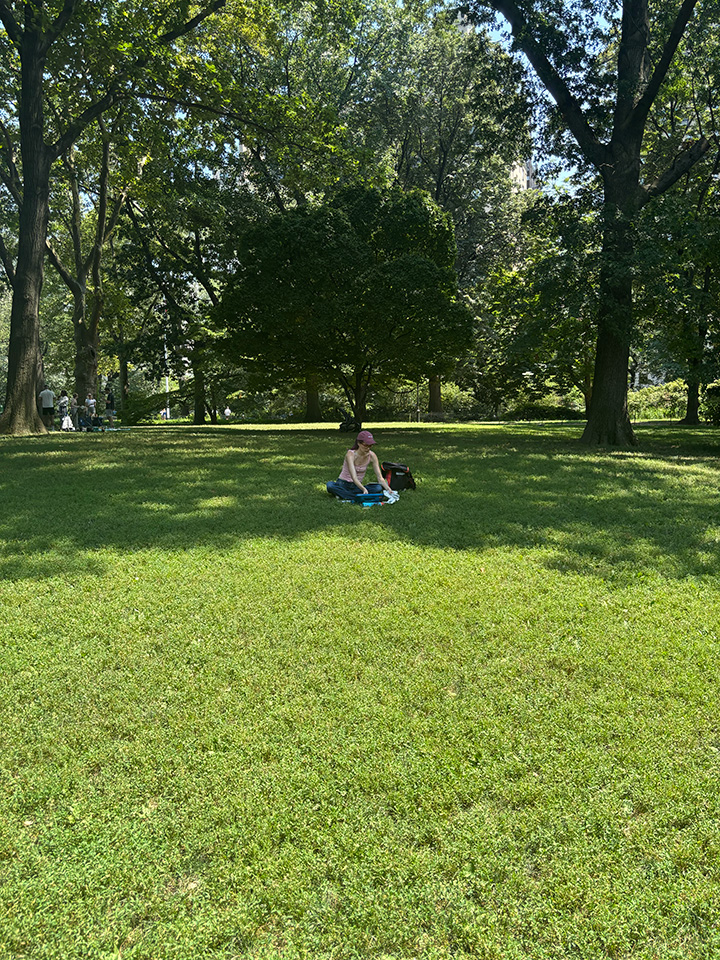
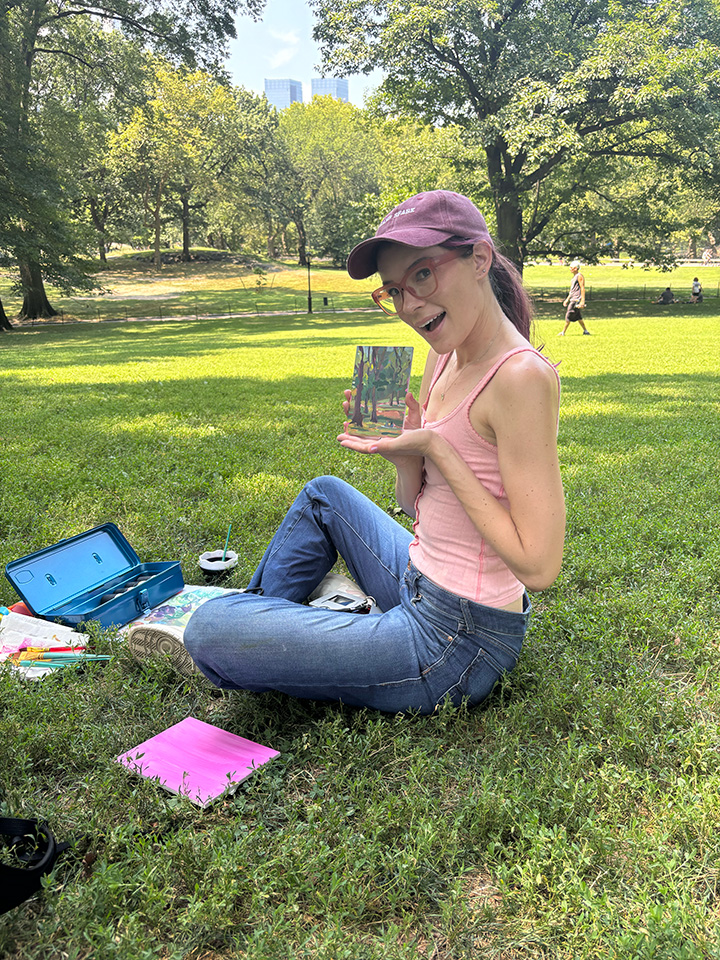
I have a fancy plein air easel and even still I always prefer painting in my lap on the ground or on a bench. I feel this approach offers three key advantages over the more picturesque standing at a French easel setup.
1. There’s less to pack 2. You stand out less and thus are less likely to attract onlookers and 3. You get to sit. Depending on your environment you may need a blanket to protect yourself from mud, thorny grass and burrs, and critters (I’m looking at you Texas fire ants 😡). And before we move on to the paints and brushes I would be remiss to not briefly remind you to wear spf, bring a hat with a brim, and bring a friend or let someone know where you are if you’re going somewhere without reliable cell service, and make sure you have plenty of water and snacks!
Ok, let’s talk art supplies.
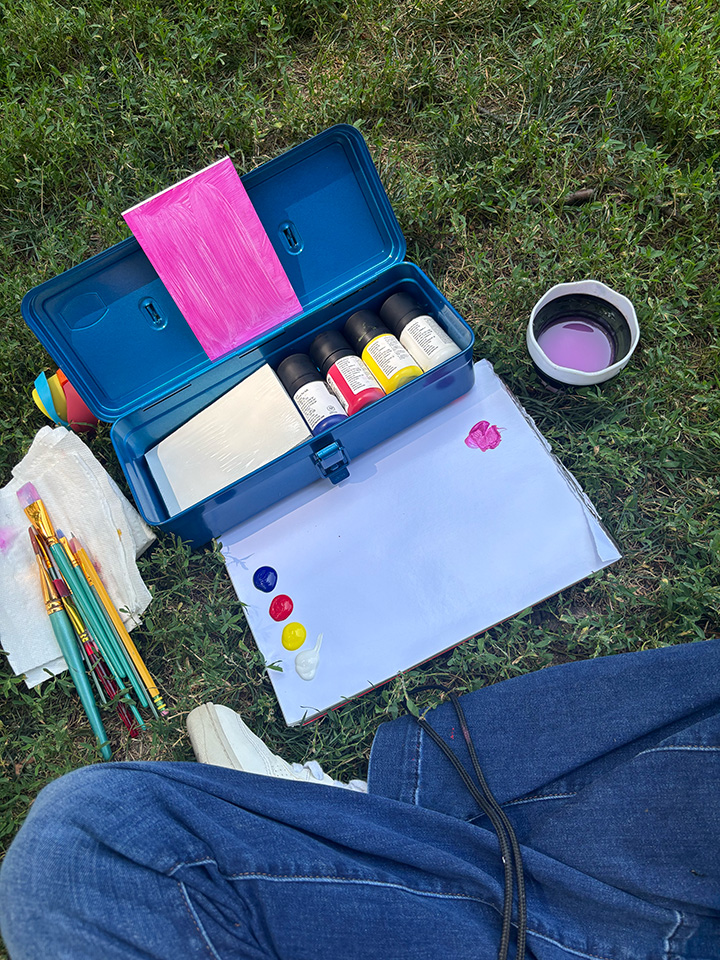
If you haven’t caught on by now, I’m partial to the simple. I have a little metal tackle box that is just big enough for:
- 4 bottles of Liquitex acryli-gouache in the shades titanium white, Cadmium Yellow, Phthalo Blue Green Shade, Primary Red
- One (1) 4oz tube of Magenta acrylic paint (I got a smaller sample sent to me in a Jerry's Artarama order 😉)
- 4-10 short handle acrylic brushes in various sizes
- Collapsible water cup
- Three (3) 4x6" gessoed panels
- View catcher tool (vital when painting en plain air)
- Paper Towels
- Straight edge tool
- Pencil
And the only part of my setup that didn’t fit in my tackle box was a 9x12” pad of palette paper. Truthfully you could just tear off two or three pieces of paper and fold them to fit in the box, however I like having the firm surface of the pad of paper to mix color on. The completionist in me was really struggling with this choice but it’s significantly harder to paint from your lap if you don’t have a nice firm place to mix your paint colors.
Want more? Check out the Not Sorry Art School Plein Air course— available as part of Lifetime Access and á la carte.
Finally, bring a water bottle. I suggest having a bottle dedicated to painting so that you can fill it up for paint water then use it to pour out your dirty paint water once you’re done. I just had my drinking water bottle this day (I’ll explain what I did with my dirty water later in the blog).
Assuming you’ve already chosen roughly what you’re going to paint—a general direction and a vibe is usually all I go on— you can set up all your supplies in a way that’s comfortable and accessible. Like I always tell my students, painting is hard, so make sure that your setup maximizes ease and efficiency! This may take some tinkering, so keep in mind your dominant hand and try to have your painting surface as close to your subject (what you’re going to paint) as possible.
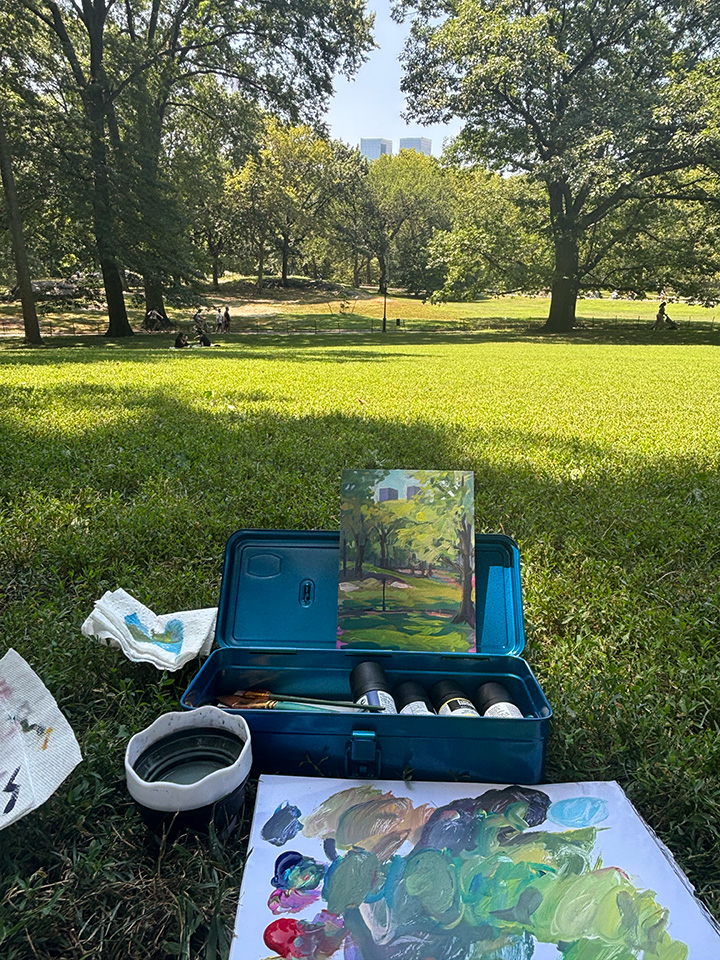
Now it’s time for the viewfinder to shine. Make sure the ratio of the viewfinder matches up to the ratio of your surface. My panel was 4x6”, so I set the adjustable slider to have the same ratio. This is instrumentally helpful in selecting the composition of your painting because our field of vision is so wide (especially compared to a tiny canvas.) Of course you may also use your phone’s camera to help you frame what you’re intending to paint, but part of the allure to painting en plein air is, ya know, being in nature and unplugging from technology yadda yadda. Listen, do whatcha gotta do, and perhaps this says more about my phone dependency than anything else, but the bliss I feel when I’ve truly forgotten my phone is unrivaled. All this to say, a tool that helps you find your composition will help you with establishing the perimeter of your composition all the way through the first drawing/block in of your painting.
Once your setup is squared away, you can then lay out your paints and jump in. I always start by painting in a wash (paint slightly thinned out with water) and letting it fully dry. You can then draw your scene in with pencil or with paint.
I find that it’s the very beginning of the painting when en plein air that is by far the most challenging. There’s always an overwhelming moment at the start. What do I include? Where are the edges again? What if the people having a picnic move? Is the light already changing?? Is that a fire ant?!
Answers:
Paint the biggest things first, no details! Only paint what you can see through nearly squinted eyes. Big values and shapes.
Find your viewfinder and look again. The first 1/3 of my painting is usually painted with a brush in one hand and the viewfinder in the other.
Once you’re satisfied with your big shapes, slowly incorporate increasing levels of information/detail until you’re happy.
You can try to paint in the picnic goers quickly if you think they’re going to move. Perhaps do a quick sketch on scrap paper or **sigh** take a quick photo so you can add them back in if they move. Or … just paint them out.
Yes, the light has almost certainly moved/changed since you sat down. You have to be at peace with the changing light. You can lean in and paint the light as it changes and let there be little incongruences in your painting. Pick a lighting and stick to it.
Listen, painting plein air is —and say this with a straight face— kinda hard core. It’s honestly as close as us artsy painter types get to an “extreme sport”. When you paint the outdoors while being outdoors, you are, as the old Vine proverb goes, “on X Games mode.” Because of the unique challenges that this activity demands of you, there has never been a better time to fully commit to the creative truth that it’s all about the process not product.
I feel I should briefly address the duration of a plein air session— just like any creative act, it varies tremendously. I usually paint a few small studies over the course of a couple hours. I generally max out at three, and in the off chance I’m working on one piece the whole time, the light changes so much over that length of time that I personally find that the scale of “fun challenge” to “getting my butt kicked by nature” to tip against my favor. My advice if you’re new to painting en plein air is to bring a few surfaces to paint on and give your self a time limit. The mindset shift from “my goal is to make a good painting” to “let’s see what I can make in 2 hours” is much more conducive to a good experience.
Now that you’ve mixed and dappled your plein air paintings, you’ll need to clean up your space!
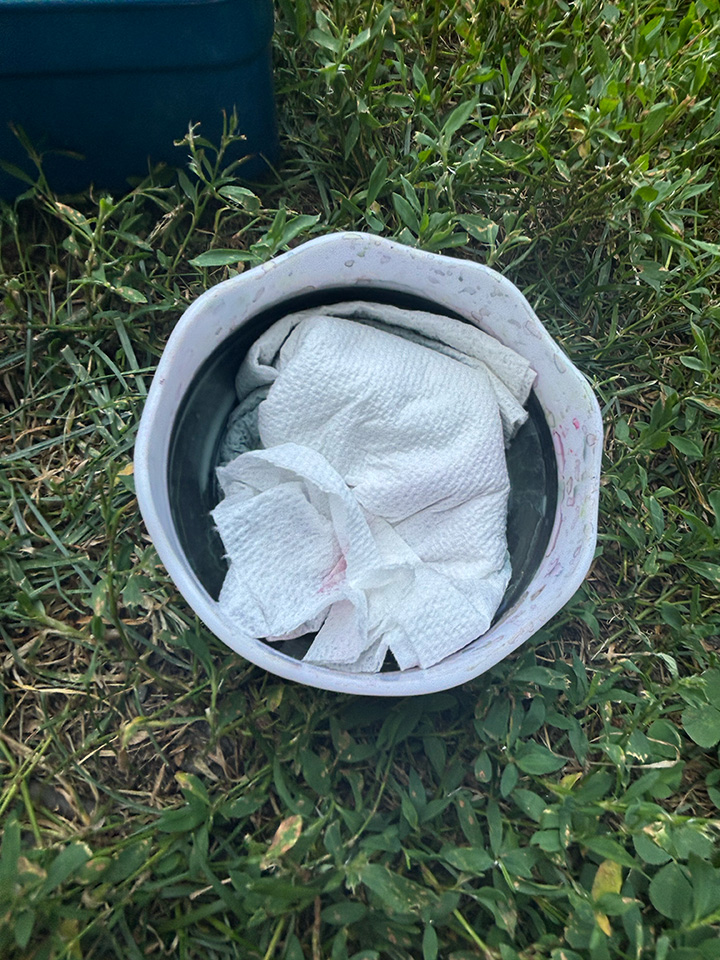
It’s important to not leave anything behind while in nature so you’ll need to put everything back in your tackle box and/or backpack, including your paper towels. As I mentioned earlier, you’ll want to responsibly dispose of your acrylic paint water after you’ve cleaned and packed up your brushes.
While paintings that use acrylic polymers to bind pigment are a vivid, accessible, and largely safe medium, the biggest drawback is the microplastics that contaminate the water used to clean your brushes. It’s important to remember: you cannot pour paint water down the sink or anywhere where it will seep into the ground water. Consequently, it is best practice to get your water into a solid form and dispose of it in the trash where it will not get into the water supply. However, when you’re out in nature, holding to this rule can be tricky. This is why I usually have a designated paint water bottle to pour my dirty water into.
Side note: in a pinch, you can use a piece of palette paper as a makeshift funnel. Then you can take your paint water home and dispose of it however you process your paint water.
Or as I did on this particular day, you can use all of your paper towels to absorb the liquid— as long as the paper towels have fully soaked up all the liquid i.e. the towels are not sopping wet and dripping, you can dispose of them in a trash can.
And friends, that’s it! In a lot of ways painting en plein air is the simple, stripped-back alternative to a full on studio practice. The only final tip I have is to make a few notes on the back of your work about the weather, date, time, temperature. I find that this not only adds to the piece but it helps you strengthen your plein air practice, a unique and distinct way to paint and experience the world around you.
Have fun and happy painting!
❤️ Sari
WANT MORE PAINTING EXPERTISE?
Sign up for the Not Sorry Art School newsletter for exclusive offers, course updates, free perks and more!


